This post comes after my very convincing experiences with using git and Github to manage my projects. For those of you who are not familiar with either git and gihub, here’s what Wikipedia has to say about git:
Git is a distributed revision control system with an emphasis on speed. Git was initially designed and developed by Linus Torvalds for Linux kernel development. Every Git working directory is a full-fledged repository with complete history and full revision tracking capabilities, not dependent on network access or a central server. Git’s current software maintenance is overseen by Junio Hamano. Git is free software distributed under the terms of the GNU General Public License version 2.
and Github
GitHub is a web-based hosting service for software development projects that use the Git revision control system. GitHub offers both commercial plans and free accounts for open source projects. According to the Git User’s Survey in 2009, GitHub is the most popular Git hosting site.
Its pretty self explaining. It is one of the best revision control systems that I have come across with and I use Github to manage and store all of my code on the cloud. Best of all, its all free :). Thanks to git and Github, I can now access all my code no matter where I am.
In this post, I will be explaining to you the basics of creating a repository on Github. The first thing you need to do to get started with it is to get an account on Github. Its easy! Just go to https://github.com and register for a new account.
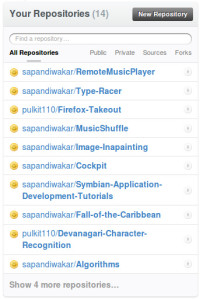
Once you log in to Github, you can then start creating repositories and manage your projects. Click on the “New Repository” button next to the list of repositories.

It will then present you a form where you can fill in your project details. Fill in some details and then click Create Repository. Now you have your very own project repository on Github. That was easy, right!
Now lets start adding some code to the repository. But first you would need to install git if you don’t already have it on your computer. For Ubuntu users, this should be pretty straight forward. Just write sudo apt-get install git in terminal and it will do this for you. For windows, you will need to install git either through cygwin or msysGit. In either case, you can follow the download instructions here. Once you have git installed, open the terminal and see if typing “git” in the console works. For windows user who have installed git from cygwin, try using git from the cygwin console. If you face any problems, try checking your environment variables if they are correctly pointing to your installed git location.
Now, lets get back to the fun part! Open the directory that you would like to add to git in terminal. Now type
git initThis will initialize an empty repository in the directory. You can then start adding files to the repository using git add. e.g. If you want to add the file named README to your git repository, use:
git add READMEYou can verify that the files have been staged to be added using:
git statusYou can also recursively add all files in your current directory using
git add .git add just adds files to the staging area. These files haven’t been added to your remote repository at Github yet. Now that you have staged the content you want to snapshot with the git add command, you run git commit to actually record the snapshot. Git records your name and email address with every commit you make, so the first step is to tell Git what these are.
git config --global user.name 'Your Name'
git config --global user.email you@somedomain.com
Now you can commit the staged changes. We will use the -m switch to add a message to the commit.
git commit -m "Initial Commit";This creates the git repository locally and commits some files to it. If you want to share the locally created repository, or you want to take contributions from someone elses repository - if you want to interact in any way with a new repository, it’s generally easiest to add it as a remote. You do that by running git remote add [alias] [url]. That adds [url] under a local remote named [alias]. You can find your remote address from github on your repository homepage.
git remote add origin <Your repository address>;To share the cool commits you’ve done with others, you need to push your changes to the remote repository. To do this, you run git push [alias] [branch] which will attempt to make your [branch] the new [branch] on the [alias] remote. Let’s try it by initially pushing our ‘master’ branch to the new ‘github’ remote we created earlier.
git push origin masterThats it! Thats all you need to do to start a new repository on github. Now whenever you add/modify your code, all you need to do is to add the files, commit changes and then push the changes to the remote repository. That’s only 1% of the amazing features that git has to offer. For a complete guide of all the functionality in git, see this wonderful guide.
